Steganography: How to hide data in images and extract them
Reading Time: 5 Minutes
Introduction
In the digital world, we can use images among other things to encode/decode information in them. Steganography is a hiding technique, which aims at delivering a hidden message where some other kind of information is already being delivered and is generally used in secret communication between acknowledged parties to establish a secured communication in an unnoticeable manner as well as to avoid drawing suspicion to the transmission of a hidden data. Many methods for hiding information in audio and images exist. More information about the steganography types, embedding techniques, and a more detailed article about how image steganography works can be found here.
Choice of tools
Thankfully, Linux users can choose from a variety of open-source tools such as Steghide, Exif, Stegosuite, Steg, Outguess, and many more. This tutorial uses Kali Linux as one of the many Debian-based Linux distros available that can be used to install and use the tools below.
We will use one graphical and one command line steganography tool for this tutorial.
Steghide: Is an open-source, command-line software that can encode and decode data into image files.
Current Version: 0.5.1
Features:
- compression of embedded data
- encryption of embedded data
- embedding of a checksum to verify the integrity of the extracted data
- support for JPEG, BMP, WAV and AU files
Installation: Steghide is already available in the Kali Linux repo.
apt-get install steghide
Creating an image with a secret message in it.
- Create a folder with the name of your choice:
mkdir steghide
- Create a new text files with some text. – This will be the secret that we want to embed in the image of our choice.
cd steghide
echo "the secret message" > message.txt
See Also: The Bug Bounty Hunting Course
- Download or use an image of your choice to hide the secret message.
For this example we used his test image that you can download it using wget <image link>, and experiment on it, or you can choose your own.
- Hide secret message in image and create a new encrypted file.
This command will embed the file message.txt in the Patern_test.jpg and create a new encrypted image, secret.jpg (stego file).
steghide embed -cf Patern_test.jpg -ef message.txt -sf secret.jpg
- Embed: embed data
- -cf: cover file
- -ef: embed file
- -sf: output file – stego file
You can also choose between different encryption algorithms and compression levels.
See the user manual of steghide with:
man steghide
- It will prompt you to enter a passphrase needed to then later extract the message.txt from the secret.jpg image.
- Enter a passphrase and re-enter it for confirmation – be sure to remember it because you will not be able to decode the secret message from the stego file.

Now, the stego file (secret.jpg) is ready.
- View info or the embedded data
You can get some information before extracting the stego file. To view the encryption algorithm, file size, and the embedded filename/secret message filename using the command below:
(You must then enter the passphrase to continue)
steghide info secret.jpg
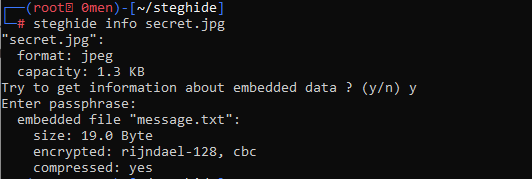
- Retrieve information of the embedded file (stego file)
The way to decode and reveal the secret message embed in the stego file. Make sure to rename or remove the original message.txt from the working folder when performing this command.
steghide extract -sf secret.jpg

- Now the extracted message can be read and found in the working folder.
Use cat to read and confirm the embedded message.

See Also: Offensive Security Tool: Nucleimonst3r
Stegosuite: Is a graphical interface steganographic tool written in Python for hiding data/extracting data them from images and more features.
Modules:
- Error Level analysis
- Threshold analysis of the image
- Edge Detection
- Metadata analysis
Version: 0.8
Installation: Stegosuite is also available in the Kali Linux repo.
sudo apt-get install steghide
Creating an image with a secret message in it.
It’s a way easier method since no prior knowledge of bash scripting or terminal is required.
- Run the tool from the terminal by typing stegosuite in the terminal and then click enter or you can find it from the navigation menu.
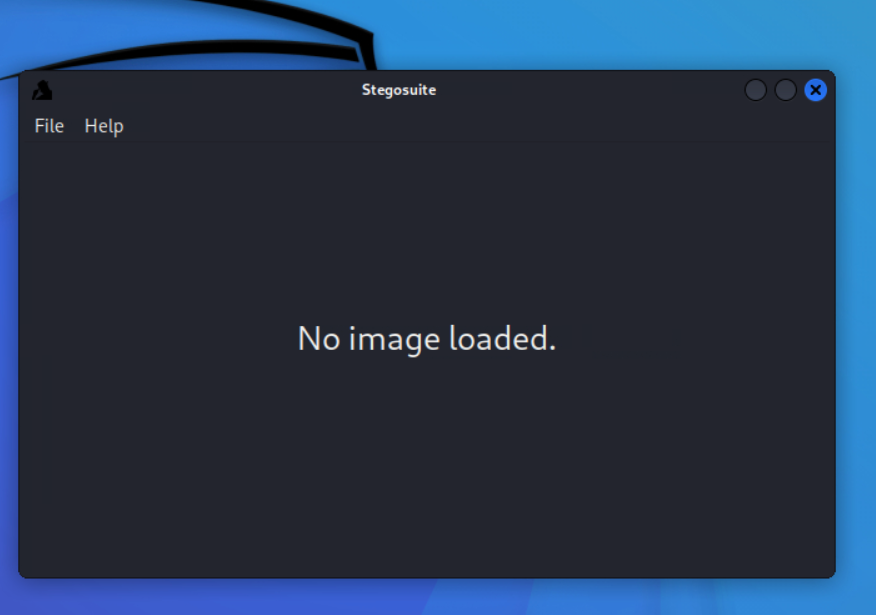
- Click file from the menu bar and choose the image to hide the secret message
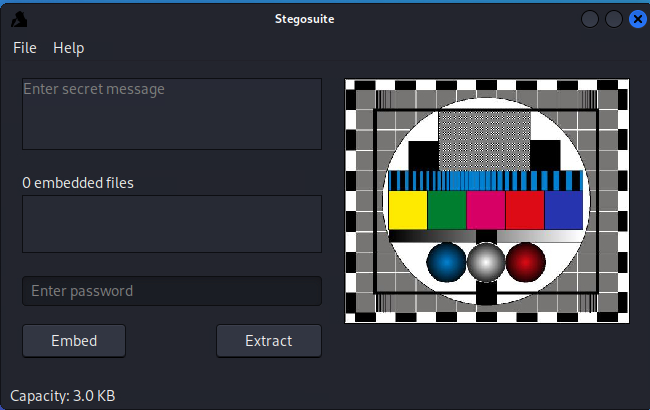
- You then just type the secret message, add the secret message.txt file
(right click on the embedded files and add it) that you want to embed, enter a password and click Embed.

- The stego file will be created on the same directory where the image was saved with the name _embed on the end.
e.g. original filename: test.jpg will be test_embed.jpg
- To extract the message just add the stego file from the file option on the header menu, type the password and click Extract.
- The secret message file will be saved also in the same directory where the stego file was saved with the same name that was embedded.
The purpose of this write-up is to make it easy for you choosing the guidelines and tips that we shared so you can enhance your experience and understand it, giving you more knowledge about Steganography.
Are u a security researcher? Or a company that writes articles about Cyber Security, Offensive Security (related to information security in general) that match with our specific audience and is worth sharing?
If you want to express your idea in an article contact us here for a quote: [email protected]
